みなさんこんにちは masa です。前回は MyBatis Generator により、初期ファイルを自動生成しました。今回はそれらを使い、実際に MySQL を操作する方法とカスタマイズ方法をご紹介します。
さて、前回 MyBatis Generator の使い方 で以下の4つのファイルが自動生成されました。
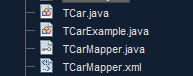
・データを格納するエンティティクラス
・抽出条件を設定するサンプルクラス
・データ操作のメインとなるマッパークラス
・上のマッパークラスに紐づいた実際の SQL を書く XML ファイル
※ファイル名は DB のテーブル名が頭につきますので、みなさんは違うファイル名でも気にしないでOKです。
1. ライブラリとデータソースの設定をする
1. Maven もしくは Gradle から以下のライブラリを入れてください。
・mybatis
・mysql-connector-java
・commons-dbcp2
        <dependency>
            <groupId>org.mybatis</groupId>
            <artifactId>mybatis</artifactId>
            <version>3.2.8</version>
            <type>jar</type>
        </dependency>
        <dependency>
            <groupId>mysql</groupId>
            <artifactId>mysql-connector-java</artifactId>
        </dependency>
        <dependency>
            <groupId>org.apache.commons</groupId>
            <artifactId>commons-dbcp2</artifactId>
        </dependency>
2. applicationContext.xml を以下の情報で src/main/resources/ に作成
<?xml version="1.0" encoding="UTF-8"?>
<beans xmlns="http://www.springframework.org/schema/beans"
  xmlns:xsi="http://www.w3.org/2001/XMLSchema-instance"
  xmlns:context="http://www.springframework.org/schema/context"
  xmlns:mybatis="http://mybatis.org/schema/mybatis-spring"
  xsi:schemaLocation="

http://www.springframework.org/schema/beans


http://www.springframework.org/schema/beans/spring-beans-4.0.xsd


http://www.springframework.org/schema/context


http://www.springframework.org/schema/context/spring-context-4.0.xsd


http://mybatis.org/schema/mybatis-spring

    http://mybatis.org/schema/mybatis-spring.xsd">

<!-- DataSource -->
<bean id="dataSource" class="org.apache.commons.dbcp2.BasicDataSource">
  <property name="driverClassName" value="com.mysql.jdbc.Driver" />
  <property name="url" value="jdbc:mysql://localhost/car" />   //接続サーバーとMySQLスキーマ名
  <property name="username" value="root" />   //データベースのユーザー名
  <property name="password" value="" />   //接続パスワード
</bean>

<!-- SqlSessionFactory -->
<bean id="sqlSessionFactory" class="org.mybatis.spring.SqlSessionFactoryBean" >
  <property name="dataSource" ref="dataSource" />
</bean>

<!-- Mapper -->
//↓id名は呼び出すために使う名前なので任意でOKです
<bean id="mp" class="org.mybatis.spring.mapper.MapperFactoryBean">
//↓valueには自動生成された *Mapper.java クラスをパッケージ名込みで指定してください
  <property name="mapperInterface" value="jp.gmo.myfirstspringboot.mybatis.TCarMapper" />
  <property name="sqlSessionFactory" ref="sqlSessionFactory" />
</bean>

</beans>
※applicationContext.xml は、データベースの接続情報とマッパークラスにID名をつけて登録する設定ファイルです。
2. データにアクセスするメインクラスを作成
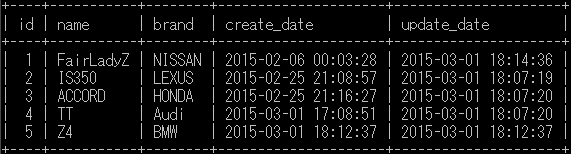
今回準備したテーブルはこんな感じです。
(データベース名 car テーブル名 t_car)
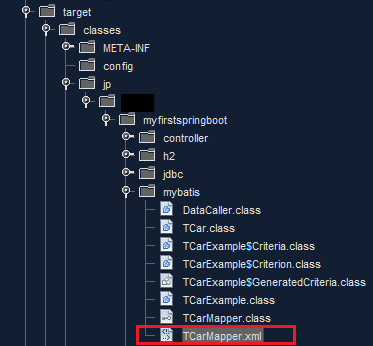
src/main/resources 配下に同パッケージ名でマッパー *.xml ファイルを配置します。
これにより、ビルド後に classファイルと同じディレクトリに入ります。
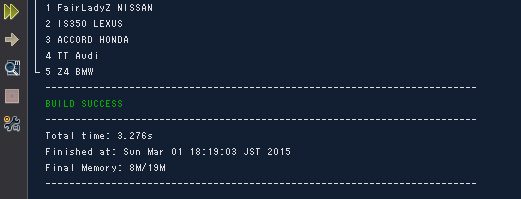
早速以下のメインクラスを作って id, name, brand のデータを取り出してみましょう。
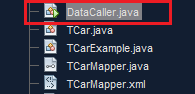
public class DataCaller {

    public static void main(String[] args) throws IOException {

        String resource = "src/main/resources/applicationContext.xml";
        ApplicationContext ac = new FileSystemXmlApplicationContext(resource);
        TCarMapper tcarmapper = (TCarMapper) ac.getBean("mp");

        TCar record = new TCar();
        TCarExample example = new TCarExample();
        example.setDistinct(true);

        ArrayList<TCar> result = (ArrayList<TCar>)tcarmapper.selectByExample(example);
        for (TCar r : result) {
            System.out.println(r.getId() + " " +r.getName() + " " + r.getBrand());
        }
    }
}
3. MySQL テーブルからデータを取り出す
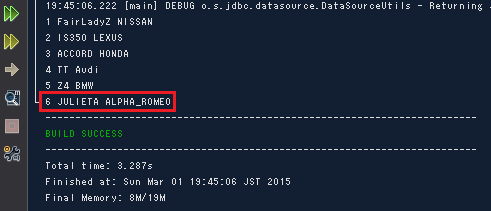
		TCar record = new TCar();
		record.setId(6);
		record.setName("JULIETA");
		record.setBrand("ALPHA_ROMEO");
		tcarmapper.insert(record);
おまけ: カスタマイズして SQL を作ってみる
(TCarExample.java)
     /**
     * original
     */
    public void setColumn(String column) {
        this.column = column;
    }
(TCarmapper.xml )
    <!--
    <include refid="Base_Column_List" />
    -->

    <!-- original -->
    <if test="column == 'id'">
      id
    </if>
    <if test="column == 'name'">
      name
    </if>
    <if test="column == 'brand'">
      brand
    </if>
    <if test="column == null">
        <include refid="Base_Column_List" />
    </if>
    <!-- original -->
(DataCaller )
public class DataCaller {

    public static void main(String[] args) throws IOException {

        String resource = "src/main/resources/applicationContext.xml";
        ApplicationContext ac = new FileSystemXmlApplicationContext(resource);
        TCarMapper tcarmapper = (TCarMapper) ac.getBean("mp");

        TCarExample example = new TCarExample();
        example.setColumn("name");  //originalメソッドの呼び出し

        ArrayList<TCar> result = (ArrayList<TCar>)tcarmapper.selectByExample(example);
        for (TCar r : result) {
            System.out.println(r.getId() + " " +r.getName() + " " + r.getBrand());
        }
    }
}
実行します。
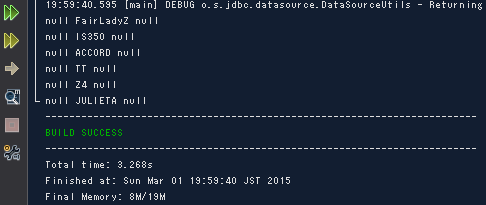
name カラムだけデータが取れましたね。
いかがでしたか?今回は MyBatis の使い方をサンプルファイルを交えて解説しました。旧 iBatis として知られる MyBatis は昔からの実績や、現在でも大規模な案件で使われる安定性をもっています。個人的には Java のデファクトスタンダード O/Rマッパーとして認知されたら嬉しいなと思っています。