JavaでのWeb開発と言えばSpringMVC+Hibernate(MyBatis)辺りが人気の組み合わせでしょうか。他にもWicket、Struts、PlayFrameworkなど様々なフレームワークが実用されています。
そんな中、標準仕様であるJavaEEは人気が今ひとつな気がしますね。仕様が重い、動作が重い、などの悪印象があるのがその原因かもしれません。
しかし実は相当に開発しやすくなっているんです。
このエントリでは、JavaEEを活用してWebアプリを高速開発する手順を2回に分けてご紹介します。
このエントリのゴール
- 簡単にJavaEE開発環境を構築する手順を説明します【今回はこちらの手順をご紹介】
- JavaEEを使ったRDBにアクセスする簡単なサンプルを作成する手順を説明します 【次回ご紹介】
前提
- Eclipseをインストールしておいて下さい
- Maven3系を導入しておいて下さい
開発環境の構築
APサーバとDBサーバをインストールせずにEclipseでの開発環境を構築します。具体的には、組み込みGlassFishと組み込みH2 Database Engineを利用します。
Eclipseプロジェクトの作成
以下のコマンドでプロジェクトのひな形を作成して下さい。
mvn -B archetype:create -DgroupId=sandbox -DartifactId=rapid-javaee -DarchetypeArtifactId=maven-archetype-quickstart -Dversion=1.0
これでrapid-javaeeというディレクトリが作られ、その中にpom.xmlが作られます。このファイルの中身を次のように書き換えます。設定の意味は極力ファイル内にコメントを付けておきましたので参照して下さい。
<project xmlns="http://maven.apache.org/POM/4.0.0" xmlns:xsi="http://www.w3.org/2001/XMLSchema-instance"
    xsi:schemaLocation="http://maven.apache.org/POM/4.0.0 http://maven.apache.org/xsd/maven-4.0.0.xsd">
    <modelVersion>4.0.0</modelVersion>
    <groupId>sandbox</groupId>
    <artifactId>rapid-javaee</artifactId>
    <version>1.0</version>
    <packaging>war</packaging>
    <name>rapid-javaee</name>
    <url>http://maven.apache.org</url>
    <dependencies>
        <!-- JavaEE7のAPI -->
        <dependency>
            <groupId>javax</groupId>
            <artifactId>javaee-web-api</artifactId>
            <version>7.0</version>
            <scope>provided</scope>
        </dependency>
        <!-- 組み込みGlassFish -->
        <dependency>
            <groupId>org.glassfish.main.extras</groupId>
            <artifactId>glassfish-embedded-web</artifactId>
            <version>4.1</version>
            <scope>provided</scope>
        </dependency>
        <!-- H2 Database Engine -->
        <dependency>
            <groupId>com.h2database</groupId>
            <artifactId>h2</artifactId>
            <version>1.4.181</version>
            <scope>test</scope>
        </dependency>
    </dependencies>
    <build>
        <finalName>rapid-javaee</finalName>
        <!-- JavaEEの仕様に従ってclassファイルを配置するための設定 -->
        <outputDirectory>src/main/webapp/WEB-INF/classes</outputDirectory>
        <testOutputDirectory>src/main/webapp/WEB-INF/test-classes</testOutputDirectory>
        <!-- javaファイル以外のファイル格納用ソースフォルダの設定 -->
        <resources>
            <resource>
                <directory>src/main/resources</directory>
            </resource>
            <resource>
                <directory>src/main/java</directory>
                <includes>
                    <include>**</include>
                </includes>
                <excludes>
                    <exclude>**/*.java</exclude>
                </excludes>
            </resource>
        </resources>
        <testResources>
            <testResource>
                <directory>src/test/resources</directory>
            </testResource>
            <testResource>
                <directory>src/test/java</directory>
                <includes>
                    <include>**</include>
                </includes>
                <excludes>
                    <exclude>**/*.java</exclude>
                </excludes>
            </testResource>
        </testResources>
        <plugins>
            <!-- UTF-8のソースを正しくコンパイルしてもらうための設定 -->
            <plugin>
                <inherited>true</inherited>
                <groupId>org.apache.maven.plugins</groupId>
                <artifactId>maven-compiler-plugin</artifactId>
                <version>3.3</version>
                <configuration>
                    <source>1.7</source>
                    <target>1.7</target>
                    <optimize>true</optimize>
                    <debug>true</debug>
                    <encoding>UTF-8</encoding>
                </configuration>
            </plugin>
            <!-- WAR作成時にweb.xmlがなくてもOKにする -->
            <plugin>
                <groupId>org.apache.maven.plugins</groupId>
                <artifactId>maven-war-plugin</artifactId>
                <version>2.6</version>
                <configuration>
                    <failOnMissingWebXml>false</failOnMissingWebXml>
                </configuration>
            </plugin>
        </plugins>
    </build>
</project>
さらに、Eclipseで開発できるようにするために、以下のコマンドも実行しておきます。
mvn eclipse:eclipse
これでEclipseプロジェクトが作成されました。
Eclipseプロジェクトのインポート
作成したプロジェクトをEclipseにインポートして下さい。ただ、この時点ではAppTest.javaにコンパイルエラーがあるはずです。

このファイル、今回は使わないので削除して下さい。
JavaEEサーバ(GlassFish)起動クラスの作成
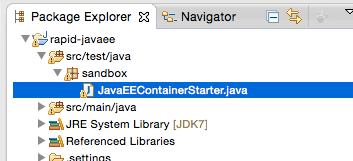
JavaEEサーバをEclipseから起動出来るようにします。src/test/javaソースフォルダ下のsandboxパッケージに、JavaEEContainerStarterというクラスを次の通りに作成して下さい。コードの意味はコメントを参照して下さい。
package sandbox;

import java.io.BufferedReader;
import java.io.File;
import java.io.InputStreamReader;

import javax.sql.DataSource;

import org.glassfish.embeddable.GlassFish;
import org.glassfish.embeddable.GlassFishProperties;
import org.glassfish.embeddable.GlassFishRuntime;
import org.h2.jdbcx.JdbcDataSource;

public class JavaEEContainerStarter {
    /**
     * 当クラスのソースの参考ページURL. <br>
     * http://www.coppermine.jp/docs/programming/2013/12/glassfish-embedded-server.html
     */
    @SuppressWarnings("nls")
    public static void main(final String[] pArgs) throws Exception {
        final long s = System.currentTimeMillis();
        final GlassFishProperties properties = new GlassFishProperties();

        // HTTPは8081番ポート、HTTPSは8082番ポートでリッスン
        properties.setPort("http-listener", 8081);
        properties.setPort("https-listener", 8082);

        // サーバ起動
        final GlassFish glassfish = GlassFishRuntime.bootstrap().newGlassFish(properties);
        glassfish.start();

        // コネクションプール作成. 組み込みH2 Database Engineを利用する.
        final String connectionPoolName = "AppConnectionPool";
        glassfish.getCommandRunner().run("create-jdbc-connection-pool" //
                , "--datasourceclassname=" + JdbcDataSource.class.getName() //
                , "--restype=" + DataSource.class.getName() //
                , "--property", "url=jdbc\\:h2\\:./db/db" //
                , connectionPoolName //
                );

        // JDBCリソースとしてコネクションプールを、jdbc/Appという名前で登録する.
        glassfish.getCommandRunner().run("create-jdbc-resource" //
                , "--connectionpoolid", connectionPoolName //
                , "jdbc/App" //
        );

        // Webアプリを配備.
        glassfish.getDeployer().deploy( //
                new File("src/main/webapp") //
                , "--name=app" //
                , "--contextroot", "/");

        System.out.println("GlassFishサーバを起動しました.");
        System.out.println(System.currentTimeMillis() - s + " ms");

        // Enterを押せばサーバ停止.
        new BufferedReader(new InputStreamReader(System.in)).readLine();
        glassfish.stop();
        System.out.println("GlassFishサーバを停止.");
    }
}
このクラスが本エントリの大きなポイントです。通常、JavaEEサーバは別途インストールして起動、Eclipseで開発するためにアダプタを導入して・・・と面倒な手順を踏む必要がありますが、この方法だと起動は簡単かつスピーディ、環境構築に苦労はなしと良いこと尽くしです。
試しにこのクラスを起動してみて下さい。10秒以内には起動完了するはずです。
以上で開発環境構築は完了!これでJavaEEの全ての機能を使った開発が開始出来ます。びっくりするほど簡単ですね。
次回予告
次回はいよいよJavaEEを使ったWebアプリ開発の手順をご紹介します。JavaEEは機能が豊富な上に手軽に利用出来る点が利点です。この利点を活用してWebアプリを簡単高速に作成していきます。
お楽しみに。